How to Solve Issues “Unable to Preview Video” When Uploading YouTube Shorts Videos created with DaVinci Resolve should be as easy as sipping your morning coffee. Yet, sometimes, issues pop up that can make the process feel like solving a Rubik’s Cube with your eyes closed. Don’t worry—this guide is here to break down the common problems and help you upload those stunning Shorts without a hitch.
Table of Contents
What Are YouTube Shorts and Why Use DaVinci Resolve?

Blackmagic Design DaVinci Resolve Studio, Activation Card
Brand: Blackmagic Design
4.5 out of 5 stars 305 ratings | Search this page
50+ bought in past month
| Brand | Blackmagic Design |
| Operating System | System |
| Format | Software Key Card |
| Global Trade Identification Number | 09338716005042 |
Before diving into problem-solving, let’s set the stage. YouTube Shorts are bite-sized videos, under 60 seconds, designed for quick, engaging content—think TikTok with a YouTube twist. DaVinci Resolve, with its advanced editing tools and powerful features, is a top choice for creating professional-grade Shorts.
However, technical snags like incorrect export settings or timecode errors can turn the process into a headache. So, let’s tackle these issues head-on.
FAQ 1: What Are the Best Export Settings for YouTube Shorts in DaVinci Resolve?
To ensure smooth uploads and crystal-clear quality, use the following export settings:
- Resolution: 1080×1920 (9:16 aspect ratio)
- File Format: MP4
- Video Codec: H.264
- Audio Codec: AAC (192 Kbps)
- Frame Rate: Match your project settings (e.g., 24 fps or 30 fps)
Pro Tip: Always preview your export settings in DaVinci Resolve’s “Deliver” tab to confirm they align with YouTube’s recommendations.
FAQ 2: Why Does My YouTube Short Show an “Unable to Preview Video” Error?
This error often results from embedded timecode tracks in your video file. Fortunately, there’s a quick fix:
- Use FFmpeg: This free tool removes unnecessary timecode tracks. ffmpeg -i input.mp4 -map_metadata -1 -c:v copy -c:a copy output.mp4
- Re-export from DaVinci Resolve: Ensure no timecode data is embedded during export.

FAQ 3: How Do I Set Up a Vertical Timeline for YouTube Shorts in DaVinci Resolve?
Creating a vertical timeline ensures your video fits perfectly on mobile screens. Here’s how:
- Go to File > Project Settings.
- In Master Settings, set the timeline resolution to 1080×1920.
- Adjust the aspect ratio to 9:16.
- Click Save.
Pro Tip: Preview your edits in DaVinci Resolve’s “Cut” page for optimal framing.
Insert Image: DaVinci Resolve’s Project Settings window with 1080×1920 resolution highlighted.
FAQ 4: Can I Upload Directly to YouTube from DaVinci Resolve?
Yes! DaVinci Resolve 18.1 and newer versions allow direct uploads. Here’s how:
- Link your YouTube account in Preferences > Internet Accounts.
- In the “Deliver” tab, select YouTube as the export destination.
- Enter video details and hit Upload.
Pro Tip: Double-check your internet connection for seamless uploads.
FAQ 5: How Can I Improve the Audio Quality of My Shorts?
Poor audio can ruin a great video. Here’s how to ensure top-notch sound:
- Use the Dynamics tool for compression and limiting.
- Normalize audio levels in the Fairlight page.
- Export with AAC audio codec for better compatibility.
Insert Table: Comparison of Audio Codecs
| Codec | Quality | Compatibility |
|---|---|---|
| AAC | High | Excellent |
| Linear PCM | Very High | Limited |
| MP3 | Medium | Good |
FAQ 6: Common Mistakes to Avoid When Exporting YouTube Shorts
To save yourself from frustration, steer clear of these common pitfalls:
- Incorrect Aspect Ratio: Ensure it’s 9:16 for vertical videos.
- Unsupported Codecs: Use H.264 for video and AAC for audio.
- Excessive Bitrate: Stick to 15–60 Mbps for efficient uploads.
Insert Bullet Points:
- Double-check your timeline settings.
- Preview the export file before uploading.
FAQ 7: Can I Use Templates for Creating YouTube Shorts in DaVinci Resolve?
Absolutely! Templates can save time and elevate your video quality. Look for:
- Vertical video packs
- Animated titles
- Subscribe and Like buttons
Many free and paid options are available online. Import them into DaVinci Resolve to streamline your workflow.
FAQ 8: Why Does My Video Lose Quality After Uploading to YouTube?
YouTube compresses videos during upload, which can lead to quality loss. To mitigate this:
- Export with a higher bitrate (e.g., 60 Mbps).
- Use H.264 codec for compatibility.
- Ensure the resolution is 1080×1920.
Pro Tip: Upload videos via a stable internet connection to avoid corruption.
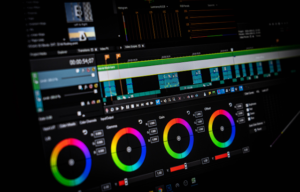
FAQ 9: How Do I Fix Color Mismatches Between Timeline and Exported Video?
Color mismatches can be frustrating. Here’s how to fix them:
- Match your timeline’s color space with export settings.
- Adjust gamma settings in the Color page.
- Use scopes (e.g., Waveform and Vectorscope) to verify color accuracy.
Blackmagic Design DaVinci Resolve Studio, Activation Card
Brand: Blackmagic Design
4.5 out of 5 stars 305 ratings | Search this page
50+ bought in past month
| Brand | Blackmagic Design |
| Operating System | System |
| Format | Software Key Card |
| Global Trade Identification Number | 09338716005042 |
Conclusion
How to Solve Issues “Unable to Preview Video” When Uploading YouTube Shorts from DaVinci Resolve doesn’t have to feel like rocket science. By mastering export settings, troubleshooting common errors, and leveraging DaVinci Resolve’s powerful tools, you’ll create high-quality Shorts that captivate your audience. Ready to level up your content game? Share your creations and let the world see your magic!